Showing posts with label Android. Show all posts

Friday, 15 November 2013


The funniest mail was that of my friends named ‘Ravi’, he claimed that he was asked to pay N5,000 by a tech guru in his environs to be able to use BBM on his device.  The good news is that BBM is free for both Android and iPhone users. You don’t need to pay any self-acclaimed guru to download & use BBM.


I downloaded the application on the 14th of November and got my pin immediately. That was easy and possible because I’ve already subscribed my email with BBM before the release of the app.
In the recent post, I gave out the link to download BBM on Android from Google Play Store and iPhone from Apple App Store. Some people still claim that they are unable to download it.
I have taken the time to download BBM for Android and BBM, and also uploaded it online.
iPhone users should click here to download BBM on their devices.
Version: 1.0.1.108
Size: 19 MB
Required: iOS 6.0 or later
Android users should click here to download BBM on their devices.
Version: 1.0.0.70
Size: 11 MB
Required: Android 4.0 and up
In case you haven’t registered your email address with BBM, follow the steps outlined below:
-Download and install BBM on Android or iOS devices
-Open up the app, enter your email address and click “Next”
-Exit application completely. (Force Close/Stop)
-Open the app and now you can create an account and be assigned a unique PIN for new accounts.
This works as at the time of this publication. I have already installed BBM on friends’ Android and iPhone devices and the app is working fine.
Then Let me have your thought about this in the comment section below.

Free Download BBM on Android and iPhone[Direct Link]

Thursday, 17 October 2013

So you've just received your gorgeous new Samsung Galaxy S4. Isn't it lovely? After you've finished caressing its sleek lines, admiring its gorgeous Super AMOLED screen and gasping in amazement at its insanely powerful processor, you might want to consider taking more control over it -- and in Android terms that means rooting.

Rooting your device is basically like gaining administrative rights on a PC. You're able to install custom firmware, remove unwanted bloatware applications and generally get a little more hands on with the core functionality of the phone. For seasoned Android veterans, rooting is practically the first thing they do when they take a new phone out of its packaging, but if you're a novice, then you might want to exercise a little caution.

As with any process which involves tampering with your phone's firmware, rooting your device can have negative as well as positive consequences. Although it's unlikely, you could end up with a bricked and unresponsive handset -- so consider yourself warned. You'll also void your warranty.

Another thing to note is that this guide relates to the GT-i9505 with the Snapdragon 600 chipset, and not the octo-core variant. This process will also not work with S4 handsets which have the a software baseband ending in MDM. You can find out your baseband reference by going to Settings > More > About Phone.

And finally, this guide assumes you're using Windows 7 on your PC.

With that out of the way, let's get on with the rooting, shall we?


1. Back up your phone

Although this process won't wipe any data from your phone, it's always prudent to make sure you've backed up any precious data before proceeding. CNET UK cannot be held responsible for any damage or data loss you may suffer as a result of following this guide, mmmkay?


2. Download Motochopper

This is the application which performs the rooting process. Although it's been developed for Motorola devices -- hence the title -- it works on certain Qualcomm-based phones, too. You can download it from here. Once you've done that, extract the files.


3: Switch on USB debugging

To perform this step, you'll need to activate your S4's developer menu if you haven't done so already. Navigate to Settings > More > About Phone. Scroll down to Build Number and tap it seven times. This will enable the Developer Options menu, which you can find in the More area of the Setting menu. Navigate there and then tick the USB Debugging box. Next, plug your phone into your PC using your standard micro-USB cable. You'll have to wait for Windows to install the necessary drivers.


4: Fire up Motochopper

Locate the Motochopper files you extracted earlier and double click the 'Run' executable. You'll see a screen like the one below: 


5: Follow the on-screen prompts

Press enter to root your device. Your Galaxy S4 should pop a notification message up -- simply tap 'OK' to proceed with the rooting process. If you don't see a message, just double check that you've got the latest Samsung drivers and that USB debugging is definitely switched on. 

Once the process is complete, you'll see a screen like the one below. Press enter, and your freshly-rooted Galaxy S4 will reboot. Open up your app drawer and you'll notice that the all-important Superuser application has been installed. Welcome to the world of rooted Android! 

How to root the Samsung Galaxy S4 Smart Phone

Wednesday, 9 October 2013

Hey guys, I thought I'd write a small guide on how to root your Android phone. The Droid X in particular! I've gotten a lot of requests from people who need help rooting their phones. I'm kind of surprised because a lot of guides are already on YouTube or Google  The Droid X is an amazing phone by the way, just got mine a month ago and am loving it!

Step 1: Make sure you're logged into your PC with Administrator Rights!
Step 2: Make sure you download "RootMyX2." Unfortunately, this only works for Windows Operating Systems (Sorry Mac Users).
Step 3: Extract the files in RootMyX2. (Make sure you remember where you extract them!)
Step 4: Now take out your Droid X and go into USB Debugging Mode! You can do this by going into Settings -> Applications -> Development -> Then check the USB Debugging box.
Step 5: Now connect your phone to your computer via the USB cable and make sure it's synced via the drop down menu on the Droid X!
Step 6: Go to the folder where you extracted RootMyX2, Right-click RootMyX2.exe and select Run as Administrator.

Step 7: Here's the tricky part! Click... "RootMe".

Step 8: Enjoy your rooted phone! You should see a new icon that says "Superuser" on your phone, this is how you can check it your phone is rooted.

Optional: To unroot your phone, just follow the steps, but at Step 7 click UnRoot Me. Simple.

How to One-Click Root your Android Phone

Friday, 27 September 2013

It used to be easy to tell a couch potato from a gym bunny. But nowadays even the most healthy among us has an HD screen in their pocket, and sofa surfers are as likely to move for a Wii as a wee.


Tech and pecs are no longer mutually exclusive, so which bits of fit kit should we all have on our handsets? 
Despite the Nike FuelBand's well-reported issues with Android, there are plenty of other fitness options on Google's operating system.

1. Adidas miCoach

Like a horribly healthy angel on your shoulder, miCoach offers voice-coaching as it tracks your workouts using GPS. With training plans for various sports and 400 built-in exercises, this Adidas app even tells you when you need to buy new shoes.


2. Office Yoga

Turn your workspace into workout space with nine sets of easy yoga movements to do at your desk. Text, pictures and audio guide you through moves to overcome everyday ailments – all low-key enough not to upset your colleagues' coffees.


3. Fitness Buddy

Offering more than 300 exercises with detailed descriptions and animations, this is one fitness buddy that won't leave you gasping as they go for the burn. A paid version adds another 1,400 exercises, HD videos, body metrics tracking and more.


4. Zombies, Run! 2

Part exercise, part role-play, this app encourages you to stay fit with the threat of imminent zombie attack. Missions involve running or jogging to collect supplies, earn rewards and progress the plot – all to a soundtrack of motivational undead moans!


5. Endomondo Sports Tracker

This feature-packed free version of a paid app will track any distance-based sport, measuring duration, distance, speed and burn, as well as letting you set targets, get audio updates on your progress, and even hear encouraging things said by your friends online!


6. Couch-to-5k

Demanding 30 minutes a day, three days a week, this app aims to have you ready for your first 5km run in just nine weeks. Cartoon coaches ease you in gently, then build you up to increasingly active workouts.


7. Nike Training Club

You really can 'just do it' with these fast, flexible workouts ranging from 15 to 45 minutes. Including audio guidance and video demos from top Nike trainers (wearing sneakers), it also boasts Facebook and Twitter integration and unlockable workout rewards.


8. FatSecret Calorie Counter

Eat yourself fitter with this handy database of calorie, fat and carb figures for supermarket and chain restaurant foods. Type in what you eat (or scan the barcode) and it'll tot up your intake in the blink of a pie.


9. You Are Your Own Gym

As the name suggests, this workout programme dispenses with gym equipment in favour of 200 exercises you can do almost anywhere. Based on a best-selling book, the app is boosted by a free video pack to show you how it's done.


10. Charity Miles

Guilt-trip your gut into submission with this ingenious app that gives to charity whenever you workout. Choose from a range of American good causes, and corporate sponsors will fork out for every mile you walk, bike or run.

10 Top fitness apps for Android

Wednesday, 21 August 2013

Need a guide through the maze of mapping apps out there? Lost in a Spaghetti Junction of software? Go straight ahead for two sentences. Ignore this one. You have reached your destination.


There are loads of reasons to use a smartphone - but one of the best is to get from A to B. Android really has that sewn up for the basics, but there's loads more to be gained from having a quick run through the Google Play Store.

So check out our rundown of the best apps to get where you want to go, see the best things or explore the night sky.

Google Maps

Download from Google Play
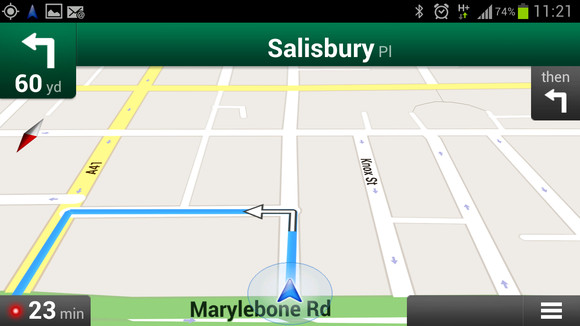
The world belongs to Google now, so who better to guide you through it? The app already offers voice-guided turn-by-turn navigation, live traffic info, Street View and indoor maps for major stores, hotels and airports, with increased personalisation just announced.

Navfree

Download from Google Play
This open-source satnav lets you download route maps before you start a journey, so you don't need a data connection once you're on the road, something that still trumps Google Maps. Its various routing options including walking routes, and automatic redirection whenever you take a wrong turn.

Outdoor Navigation

Download from Google Play
Aimed at hikers, bikers, joggers and doggers (probably), this route planner uses Google Maps and others to help you find your way through the woods. Maps display latitude, longitude and a digital compass, while stats track your progress, speed, etc.

Maverick GPS Navigation

Download from Google Play
Another good option when going off-road, Maverick lets you scroll through a wide range of online maps then caches them for use offline.

Save and share options include Google-friendly GPX route recording, so everyone can see exactly where you've been.

GPS Essentials

Download from Google Play
Casual travellers will be overwhelmed by the wealth of data, but hardcore navigators will feel they were headed here all along.

A customisable dashboard offers 45 widgets, ranging from altitude, bearing, declination and distance to latitude, longitude, sunrise, moonrise and more.

Tube Map Live Underground

Download from Google Play
The iconic London Underground map is a classic of no-nonsense navigation and this is the best of many Android apps to give it an interactive update, with a GPS station finder and route planner, live arrivals and departures and more.

Boat Beacon AIS Navigation

Download from Google Play
Offering basic marine navigation, this clever app uses AIS (Automatic Identification System) data to keep you apprised of your place on the water in relation to other vessels, up to 12 miles off the coast in the UK and US.

StarStruck Navigation

Download from Google Play
Taking the art of navigation right back to its roots, this app determines your location by the stars and planets in the night sky.

Using your smartphone's sensors as a makeshift sextant, it's a fun and battery-friendly alternative to GPS.

Soviet Military Maps Free

Download from Google Play
This app delivers exactly what it says: cold war topography from behind the iron curtain. 
Though mostly complied in the 1980s, its coverage of Africa and Asia offers details Google is yet to get to grips with.

Plus: just look at it. It's more detailed than you can ever hope to see, and reminds us of the long car journeys where looking at the map was the only thing to keep us entertained.

Geocaching

Download from Google Play
A modern take on the treasure map, the official app of Geocaching.com includes coordinates for close to two million hidden containers around the world, with options to sort by difficulty or location. A great way to discover this GPS-based hobby.

10 Top mapping apps for Android

Tuesday, 20 August 2013

For those of you who want to root your Nexus 4 Android smartphone, here’s a step-by-step tutorial showing you how to root a Nexus 4 on Windows, Linux/Ubuntu, or Mac OSX computer.


This works for all Android versions including Android 4.2.1 and 4.2.2.

This rooting guide will allow you to also backup and restore your apps/settings.

Before we begin, please BACK UP EVERYTHING on your internal storage of Nexus 4 to your hard disk (you can do this by connecting it to your computer via USB cable or use AirDroid app).

This zip package contains everything you need including drivers for Windows and rooting files for all Windows, Mac, and Linux.  Please download and unzip.


Step 1. 

Go to Settings->About Phone on your Nexus 4.


Step 2.

Hit the “Build Number” couple times until your phone says, “You are now a developer”.  Hit the back button. 


Step 3.

You will now see extra menu called “Developer options”, hit it.


Step 4.

Make sure Developer options is ON and USB debugging is also checked then connect a micro-USB cable from your Nexus 4 to your computer.  


Step 5.

For Windows, you will need to install drivers. If you have Linux/Ubuntu or Mac OSX, skip to Step 7.


Step 6.

Open Device Manager on your computer and update the Nexus 4 with exclamation mark with drivers provided in Nexus4Root.zip.


If you see something like “Android ADB Interface” you are ready for the next step.


Step 7.

Open a command prompt (or terminal for Linux/Ubuntu or Mac) and type:


For Windows: 
cd Downloads 
cd Nexus4Root 
adb backup -apk -all -f backup.ab
  
For Linux/Ubuntu:
sudo -i
cd /home/UserName/Downloads/Nexus4Root
chmod 755 *
./adb-linux backup -apk -all -f backup.ab
  
For Mac OSX:
cd Downloads
cd Nexus4Root
chmod 755 *
./adb-mac backup -apk -all -f backup.ab 


Step 8.

Go to your phone and you should see a Pop-up window asking you if you want to backup your data, hit “Back up my data”.  This will backup all of your settings, apps, app data, wifi passwords, etc…etc…  It will NOT BACKUP contents of your internal storage such as your personal videos/photos (you should have done that before following this guide!!!).


Step 9.

Once backup is done, go ahead and turn your Nexus 4 power off.  Then hold down the Volume Down and Power buttons together for about 5 seconds.  


Step 10.

Once in bootloader menu, connect a micro-USB cable from your Nexus 4 to your computer.


Step 11.

Open up Device Manager again, if you don’t see “Android ADB Interface” you will have to install drivers again.  Repeat Step 5 to install drivers.  For Ubuntu/Linux or Mac OSX, skip to Step 12, no drivers required!


Step 12.

Next go back to command prompt/terminal and type:


For Windows: 
adb oem unlock
  
For Linux/Ubuntu: 
./adb-linux oem unlock
  
For Mac OSX: 
./adb-mac oem unlock 


Step 13.

Go to your Nexus 4, hit the Volume Up button to select “Yes” and hit the Power button.  Then hit the Power button again to re-boot your phone


Step 14.

Once re-booted, your Nexus 4 will be like the day you got it, everything wiped and starting from scratch. Go ahead and sign in.  


Step 15.

Connect your Nexus 4 to your computer and copy the file CWM-SuperSU-v0.99.zip to anywhere on your Nexus 4.


If you have trouble on Mac OSX connecting to your Nexus 4, download and install Android File Transfer. 
Also, if you have more trouble, you can download this file with your Nexus 4′s browser at DownloadAndroidROM.com. (It will be saved in your Downloads folder btw.)


Step 16.

Re-boot into the bootloader like you did in Step 9 and connect a micro-USB cable from your Nexus 4 to your computer.  


Step 17.

Go back to your command prompt/terminal and type:


For Windows: 
fastboot flash recovery recovery-clockwork-touch-6.0.2.3-mako.img
  
For Linux/Ubuntu: 
./fastboot-linux flash recovery recovery-clockwork-touch-6.0.2.3-mako.img
  
For Mac/OSX: 
./fastboot-mac flash recovery recovery-clockwork-touch-6.0.2.3-mako.img


Step 18.

Go back to your Nexus 4, choose “Recovery mode” using Volume buttons and hit the Power button.  


Step 19.

Once in ClockworkMod(CWM) Recovery, choose “install zip from sdcard”.


Step 20.

Next, choose “choose zip from sdcard”.  


Step 21.

Choose “0/”.


Step 22.

Choose “CWM-SuperSU-v0.99.zip” and hit “Yes”.  This is the actual rooting file, which included su binaries and SuperSU app, giving your phone root.  This is the only part of this tutorial that actually roots your Nexus 4.  We only did all the other steps to unlock the bootloader and install CWM Recovery which allows us to install this file on our phone.  


Step 23.

Choose “Reboot” from the main menu, if you see the following screen, make sure to choose “Yes – Disable recovery flash”.  This is so you will have permanent CWM recovery as stock Android operating system overwrites it on re-boot if you don’t say yes here.


Step 24.

Once rebooted you should find an extra app in the app drawer called “SuperSU”.  Congratulations!  You’ve successfully rooted your Nexus 4!  You can download rooted apps like Titanium Backup app (which I highly recommend you to run once) and verify you have full root.  


Step 25.

Now, let’s try to restore some of your settings, apps, and app data.  If you did make a backup of your internal storage before you started rooting, go ahead and copy all your files back into Nexus 4 internal storage.


Next, go back to command prompt/terminal and type:

For Windows: 
adb restore backup.ab
  
For Linux/Ubuntu: 
./adb-linux restore backup.ab
  
For Mac OSX: 
./adb-mac restore backup.ab 

Once that’s done, you should find your Nexus 4 fully restore with all of your settings, apps, app data, and your photos/videos plus rooted phone. 
Congrats! 

How to Root Nexus 4 [Any OS]

 
Computer World With IT © 2015 - Designed by Templateism.com