Showing posts with label Networking. Show all posts

Monday, 7 October 2013

HELLO Everyone Friends.....

Today we will learn how to find out the IP address of your Victim's computer while chatting on Social Networking websites.
Find IP of your Friend's PC

 
I will be using GMAIL to demonstrate...
First let’s clear some concepts. When we do direct chatting with our victim via chat box, our message 1st goes to Gmail.

server then it is forwarded to us or to victim who is on chat. But when we do Video or Call then we get connected directly to the Victim's computer. Now, when we

do chatting simply, hereby our system gets connected to Gmail server, thus if we try to find out the ip then we will get Gmail sever IP & when we do Video or Call.

chatting then as our system is directly connected to victim's computer, so we will get victim's computer IP Address.
Now let’s do it practically,
Fire up your

BACKTRACK machine.
Download googletalk plugin from google & you will get a package by name ”google-talkplugin_current_i386.deb
Execute this file by the

following command:-
dpkg –i google-talkplugin_current_i386.deb

Now, goto your Terminal & type “”etherape””(without quotes)
goto CAPTURE ....& over there

select your interface(network card)
Login into your Gmail account & start your video or call chatting & switch on to etherape window to check out the IP of your

friend...(& if you are simply chatting then you will see Gmail sever IP address)

Find IP of your Friend's PC

Tuesday, 11 June 2013

Today i will tell you an awesome trick with which you can use your iPhone, iPad or iPod as your PC’s keyboard or mouse. With this trick you can control both cursor and typing abilities for your single device. Isn’t it cool? Well i really liked it so that is why i am sharing this with you.
Logitech touch mouse
There is an an app which can turn your iPhone, iPad or iPod into fully functional mouse and keyboard . The app is TouchMouse. TouchMouse is a free iOS app, which gives us a cool option of alternative keyboard and mouse for our PC. So in this post i will tell you “How To Turn Your  iPhone, iPad or iPod Into a Temporary Mouse And Keyboard For Your PC”.

How To Turn Your iPhone, iPad or iPod Into a Temporary Mouse And Keyboard For Your PC

1. Install TouchMouse On Your PC

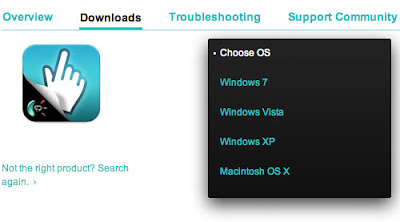
The first and foremost step required for this purpose is installing TouchMouse on your computer. You can download TouchMouse for your PC HERE.
Install TouchMouse On Your PC
After installing the correct version of TouchMouse on your PC you may proceed to step 2.

2. Installing TouchMouse on iPhone or iPad

The next step is to install TouchMouse on your iOS  device. You may download it from HERE.
Installing TouchMouse on iPhone or iPad

3. Connecting your Computer to iPhone, iPad or iPod

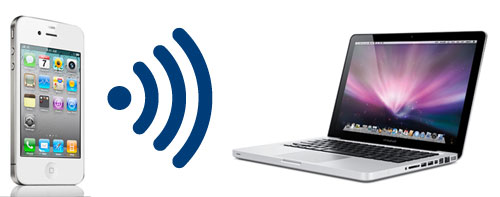
Then the next step is connecting both the devices on the same hotspot. Dont know how to create a hotspot, then check it out here – “How to Create an Instant WiFi Hotspot“.
Connecting your Computer to iPhone, iPad or iPod

4. Launch TouchMouse From iPhone, iPad or iPod

You are nearly done. When you see that both the devices are connected then run TouchMouse on your iOS device and you will see that your computer will be visible for selection. Tap against your PC name to select it and your are done. You may now use your alternative mouse.
Launch TouchMouse From iPhone, iPad or iPod

Using TouchMouse

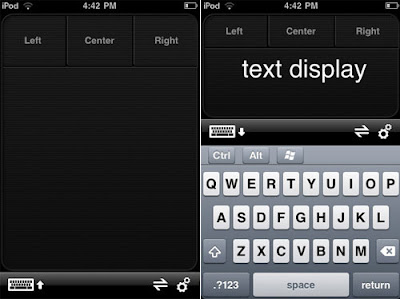
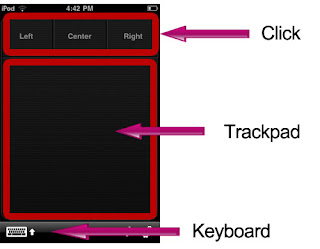
TouchMouse is a easy and simple app with clear functions and no technical skill is required for using it. There are three major buttons i.e Left , Center and Right as shown below. 
Using TouchMouse
You may use trackpad for controlling the movement of mouse. Tapping the keyboard icon will open your device Qwerty keyboard.
So in this way you may utilize each and every function of your  device and also leave a good impression over other people. Hope you would like this article.

How To Turn Your iPhone, iPad or iPod Into a Temporary Mouse And Keyboard For Your PC

Sometimes we need to create a WiFi hotspot so that we could connect other devices like PC , Smartphone’s , iPod or anything else that supports WiFi. So Connectify is a Free Utility that can allow you easily make your Windows PC as WiFi hotspot and connect other devices to it easily. If you are bored up with your slow internet speeds on mobiles or other similar devices , this is the perfect solution to boost up your speed easily.
What We Need To Use Connectify
1. Laptop that has internal WiFi or PC with internal or external WiFi Adapter.
2. Active Internet Connection
Let Us See How Connectify Works


Getting Started With Connectify

1. First of all download Connectify by clicking HERE.
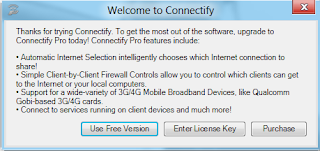
2. Now Install it by running the .exe file and reboot your PC . When you restart your machine you see a window like this , Run Connectify by clicking “Use Free Version”
Connectify Welcome Screen
 

Configuring your new WiFi hotspot

3. There are some basic setting you need to do at startup. First of all name up your connection and give it any password to secure your connection.
 
4. Now under Advanced Settings choose up your Internet connection. You can see the image below for more details -  
Connectify Settings Screen
 

Working Up With New WiFi Hotspot

5. To start streaming you just need to click start Hotspot. 
 
6. Connect all your devices with the name and password set up by you.
 
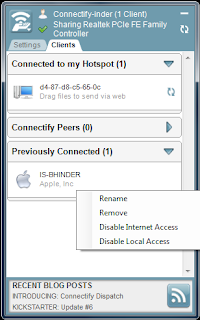
7. Now click on the Clients windows in top menu next to settings. Here you can see the list of all devices sharing your Internet connection.
 
Connectify Clients Screen
 
8. If you detect any unknown device you can easily remove it or disable access by just clicking right mouse button and selecting the appropriate button. 

Conclusion- 

So in this way Connectify is a great app to share internet connection easily and allows us to surf at High Speeds.

How to create an Instant Wi-Fi Hotspot with Connectify

Saturday, 11 May 2013

Free Calling


Here some useful site calling your relatives and your friends unlimited talks day and night.some sites give limited minutes but it’s enough for calling

1.http://talkster.com


2. http://rebtel.com


3. http://spoofcard.com


4. http://voipraider.com


5. http://icall.com


6. http://freeipcall.com


7. http://evaphone.com


8.http://m.ibibo.com


9.http://m.mig33.com


10. http://m.talki.me


11. http://minowireless.com


FREE CALLING SITES

Tuesday, 26 March 2013

Hi guys, today let me show you something really important in browsing internet.

Internet takes a prominent place in today’s fast moving world. There is no place without internet connection, but the problem that we all face today in using internet is SPEED. There are numerous software in internet itself to increase the speed of it, but how many of those really works?


How would you feel if I tell you a way to increase the speed without any software or expenses? There is a simple windows trick, I tried it and felt the difference, it made my internet connection 20% - 30% speedy, and then only I got the idea to share it with you all.


Speed up Internet 20% - 30% without any Software

Let's see how to do :

Go to Start – Run or Click Windows key +R


Now type gpedit.msc


Click OK.

Now Local Group Policy will appear.


Next navigate to "Administrative Templates" ---> 
"Network" --->
"QoS Packet Scheduler"


In "QoS Packet Scheduler" double click on "Limit reservable bandwitdh". 

"Limit reservable bandwitdh" box will appear.

In "Limit reservable bandwitdhmake it "Enabled
Then set "Bandwidth limit: "0"
Click OK.


Now you have completed and when you browse the internet, definitely you will feel the difference. If this article is useful, put your comments and also share it with your friends through social networks.
Meet you in the next article :)

Speed up Internet 20% - 30% without any Software

Saturday, 19 January 2013


In these days everyone depends on network to share files, folders, photos, videos and conversations. Microsoft is looking ahead about all types of networking in Windows 7. HomeGroup is one of the interesting networking feature which makes easy sharing issues over home network in windows 7. You can easily share pictures, musics, videos, and printers with any one on your home network. None can modify or delete your shared files and folders without your consent. You can also prevent any particular files or folders from being shared and also share extra libraries later.
The HomeGroup networking becomes more useful if you want to share a printer.

How to create a HomeGroup?

  • Click the “Start” button and select “Control Panel“.
  • Click on “Choose Homegroup and Sharing option” under “Network and Internet” section in the Control Panel window.
  • Now the HomeGroup window will appear. To create a HomeGroup click on “Create a homegroup“.
  • In this upcoming window you can see several entries  like Photos, printer, music, video,document which you can share in Homegroup. To share, just check the box and click “Next”.
  • Now the system generates a random password. Print or write down this password. Give this password information to the other users who want to join your HomeGroup network. Click on “Finish“.
Now your HomeGroup network  has been created successfully. You can change your HomeGroup password and sharing options.

How to join in a HomeGroup network?

To join in a HomeGroup network the user’s computer must be running with Windows 7. A user must provide the password which was created at time of creation of the network. To join
  • Open the HomeGroup window from the Start menu > Control panel > Network and Internet >Choose Homegroup and Sharing option.
  • A new window “HomeGroup” will appear. To join in a network click on “join now”.
  • “join a Homegroup” window will open. Check the boxes which you want to share and click on“Next”.
  • Now type in the password and click on “Next“.
  • You’ll get a message saying that you have joined the homegroup. Click on “Finish“.
Now you have successfully joined a HomeGroup and ready to access the shared files and folders by the Homegroup users.
Your HomeGroup network is password protected and you can change that at any time. To join in a HomeGroup network the computer must be running with Windows 7 operating system. HomeGroup feature is available in all version of Windows 7. Though you can’t create HomeGroup in Windows 7‘Starter’ and ‘Home Basic’ version, you can join in any HomeGroup network.

How to Create HomeGroup Network to Share Files & Folders in Windows 7


I have a laptop and a desktop and I use them simultaneously for my work. But the problem arises with moving around my hands to each mouse-keyboard set while working on both computers.
If you use multiple computers in your workplace, sharing one keyboard and a mouse between the computers may be life saving approach for you.
InputDirector can be right choice for those who use multiple computers and want to share only one keyboard-mouse set across them.

How to setup your computers to share one mouse-keyboard set

First of all you have to have your computers connected with a network via LAN cable or other network connector. Here, I will show how to configure computers to connect via LAN cable and share a mouse and keyboard set.
How to connect two computers through LAN cable
Insert the plugs into the LAN ports of the both computers. The lights in the ports should blink. If you are in Windows 7, go to Control Panel > Network and Internet > Network and Sharing center in each computer and click on Change adapter settings from the left sidebar. Then right-click on the Local Area Connection icon and choose Properties. Select Internet Protocol Version 4 (TCP/IPv4) and click on the Properties button.
Now, switch to Use the following IP address field by selecting the radio button and put 192.168.0.1 at the IP address field in one computer and put 192.168.0.2 in another. In both computer, the Subnet mask should be 255.255.255.0. Click OK while you are done.
That’s all to configure your computers to connect them via a LAN cable. The real fun starts now!!
Here, I will use two terms: “Master” and “Slave”. Say, Computer 1 (whose mouse and keyboard you want to share with other) is master and Computer 2 is slave. Both of them are connected trough a Local Network Connection and you can use only one set of Keyboard and mouse with both of them; more over you can share files, documents and also the clipboard which allows you to copy-paste any thing between those computers. Following are the steps in details.
1. Install InputDirector in both computers.
2. Open InputDirector in the Master computer and head to the “Global Preferences” tab. Select “On Start: Input Director is Enabled as Master” as well as the check box “Share Clipboard” to copy files quickly across the computers. Also change the Preferred Network Interface by clicking on theChange button and select the right entry for your LAN card from the drop-down list.
3. Flip to the “Master configuration” tab and click on the Add button to add the Slave computer name. You can get the slave computer’s name by Right-clicking on Computer then choosing Properties at the slave computer. Once you get the computer name, put it at the Host name field, then click OK.
After adding the name, it will appear in the Slave systems list.
4. Go to the slave computer and open InputDirector. Flip to the Global Preference tab and select the option “On start:” as Input Director is enabled as a Slave, Change the Preferred Network Interface in a similar way that you did in your Master computer.
5. Head to the Slave Configuration tab and you should see the master computer’s name at theMaster hostname list. Select the radio button saying Allow any computer to take control.
Once you are done, you will see a system notification saying “The Slave system is now available”.

How to share the mouse

After a successful configuration of InputDirector, move the mouse to the edge of your Master computer and it will appear in the Slave computer’s monitor. Now you can do everything by the mouse as if it is connected separately with it.

How to Share the keyboard

The keyboard will work in that computer in which the mouse appears. Suppose, you are in the master computer and want to type some thing in the salve computer; just move your mouse to the edge of your screen and get in into the slave computer. The keyboard automatically gets activated for the slave computer and you cam type everything at everywhere with the keyboard.

How to Share Keyboard and Mouse Between Two Computers Connected with LAN Cable

 
Computer World With IT © 2015 - Designed by Templateism.com