Everybody require to take screenshots of their computer screen for different purposes. There are many ways to take screenshots in your PC. But according to different situations different methods are used. I will now explain different methods and the situations where they are required.
(1) Pressing the Print Screen button
You can press the print screen button in your keyboard generally present at the top right position. After pressing it the image will be copied to your clipboard, now go to Paint or other image editor and paste it to save the screenshot.
Situations: It is required in the situations when you need to take snapshot of the entire screen including taskbar. Mouse will not be present in this type of snapshots.
(2) Pressing the alt+Print Screen button
If you need the snapshot of your entire screen but don't want the task bar then do this. After taking the screenshot paste it in any image editor like Paint to save the snapshot.
Situations: It is required when you don't need the task bar to be present in the image. In this case mouse will also not be present in the image.
(3) Using Windows Snipping Tool
If you are using Microsoft Windows 7/8 or vista then you can easily do this using the Windows snipping tool. Type snipping in the start menu and click on the icon. A window will open where you can take a snap shot by pressing the New button.

Situations: You will require this method when you need to take snapshot of a particular portion of the screen instead of the entire screen. This is a default tool present in Windows 7. So you can easily do this. And it will also give you an option to save the image so no need to paste the image in Paint to save it.
(4) Using PtrScr tool

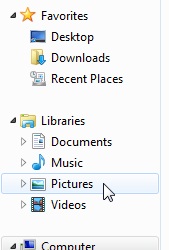
Situations: You will need this tool when you need to emphasize a button or a link. This can also take the snapshot of the cursor. You can see in the side by diagram, I wanted to emphasize on the Pictures button so I put the mouse on it and took the snapshot.
(5) Using WinSnap tool
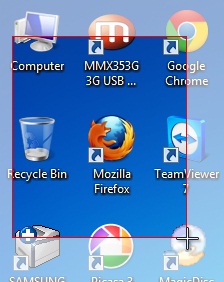
 This tool is really a great tool and is more advanced. It can also take snapshots of the rounded corner. You can also emphasize on a particular portion by making it lighter and doing other portions darker as shown in the side figure. Download the tool from below.
 Read more features about WinSnap here.
Situations: This tool has a lot of awesome features. I can not mention all the features at this time. I have given you the link just above, read all of its features. After visiting the link you will automatically know in which situation you will need this tool.


Post a Comment
Note: only a member of this blog may post a comment.