
Hi visitors,
Today i am gonna to tell you how to change the name of the processor permanently
follow my steps
Step 1 . First you Log in to your registry editor (Start -> Run -> type regedit)
Step 2 . Go to the following registry options
... HKEY_LOCAL_MACHINE \ HARDWARE\ DISCRIPTION \ System \ CentralProcessor \
or
HKEY_LOCAL_MACHINE \ HARDWARE\ DISCRIPTION \ System \ CentralProcessor \ 0 \
or
HKEY_LOCAL_MACHINE \ HARDWARE\ DISCRIPTION \ System \ CentralProcessor \ 1 \
Step 3 . Now Find a key with the name “ProcessorNameString”
Step 4 . Click the right key and select Modify and change the Value Data to suit you
(example: Core 2 Duo).
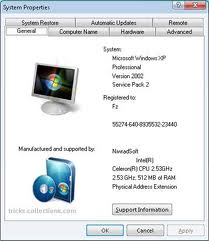
Now you can see changes in your System Properties
(right-click the My Computer iconand select Properties
NOW YOU CAN SEE THE NEW PROCESSOR
Step 4 . Click the right key and select Modify and change the Value Data to suit you
(example: Core 2 Duo).
Now you can see changes in your System Properties
(right-click the My Computer iconand select Properties
NOW YOU CAN SEE THE NEW PROCESSOR


Post a Comment
Note: only a member of this blog may post a comment.